Managing Your Team
LighthouseBeyond makes it easy to collaborate with your team on website performance optimization. This page explains how to add, manage, and organize your team members within your LighthouseBeyond account.
Getting Started
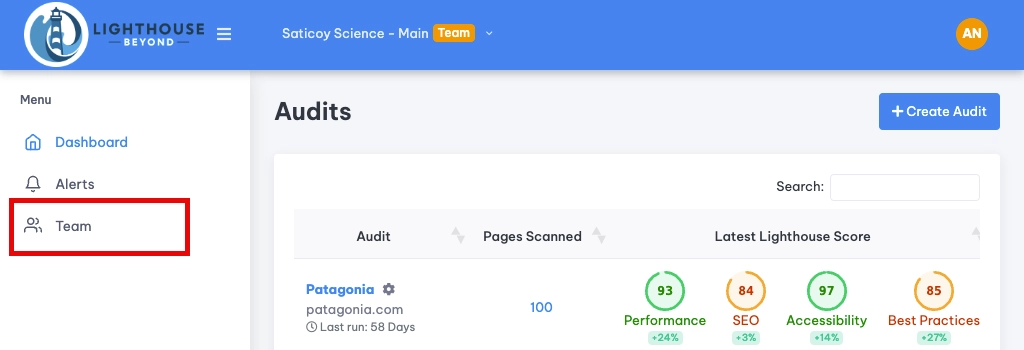
To access your Team management page, simply click on the "Team" option in the main navigation menu.
Inviting New Team Members
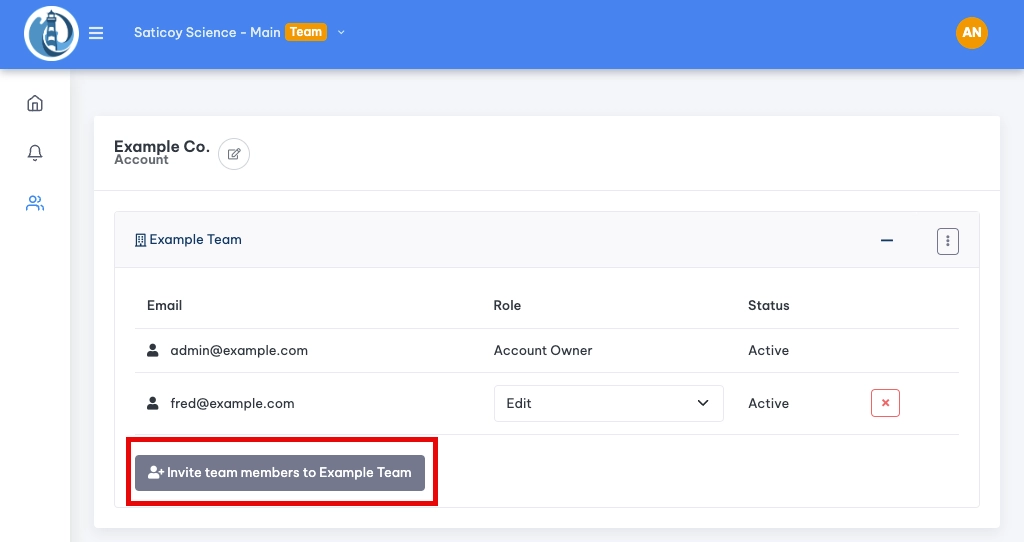
Ready to bring more hands on deck? Here's how to invite new users to your team:
- Click the "Invite Team Members" button. This will open a simple form.
- Enter the email address of the person you'd like to invite.
- Choose their access level. This determines what they can see and do within LighthouseBeyond. (See the "Understanding Access Levels" section below for more details.)
- Click "Send Invite".
What Happens Next?
- For users without a LighthouseBeyond account: They'll receive an email inviting them to join. Once they sign up, they'll be automatically added to your team. You'll see their status as "Pending" until they complete their registration.
- For users who already have a LighthouseBeyond account: They'll be added to your team instantly.
Understanding Access Levels
LighthouseBeyond offers different access levels to give you fine-grained control over what each team member can do. Here's a breakdown:
| Access Level | Permissions | Ideal For |
|---|---|---|
| Read Only | Can view alerts and audits. Cannot create, edit, or delete anything. | Stakeholders who need to monitor progress |
| Edit | Can create and edit alerts and audits. Cannot manage team members or account settings. | Team members directly involved in optimization work |
| Admin | Has full control: can create and edit alerts/audits, manage team members, and edit the team name. Cannot change billing or plan settings, or the account name | Team leads or project managers |
| Account Owner | Similar to Admins. In addition, they have access to edit billing, plans, and the account name. | The primary person responsible for the account |
Tip: Think about what each person needs to do in LighthouseBeyond when choosing their access level. Giving them the right permissions helps keep things organized and efficient.
Managing Existing Team Members
The Team management page provides a clear overview of all your current team members, including their email addresses and access levels.
Changing a User's Role
- Find the team member whose role you want to adjust.
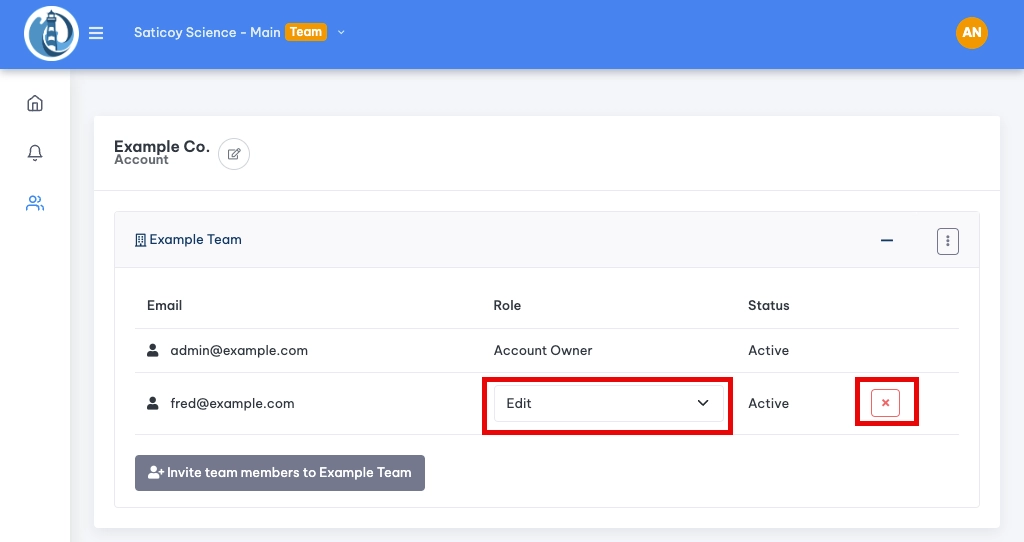
- In the "Role" column, click the dropdown menu next to their current role.
- Select the new access level you'd like to assign them. The change is saved automatically.
Removing a User
- Find the team member you want to remove.
- Click the red "X" button at the end of their row.
Important Note about Account Owners: The account owner is the user who originally created the LighthouseBeyond account. Their role cannot be changed or removed through the Team management page. If you need to transfer ownership of the account, please contact our support team, and we'll be happy to assist you.
Managing Your Account and Team Name
Changing Your Account Name
The account owner can easily update the account name.
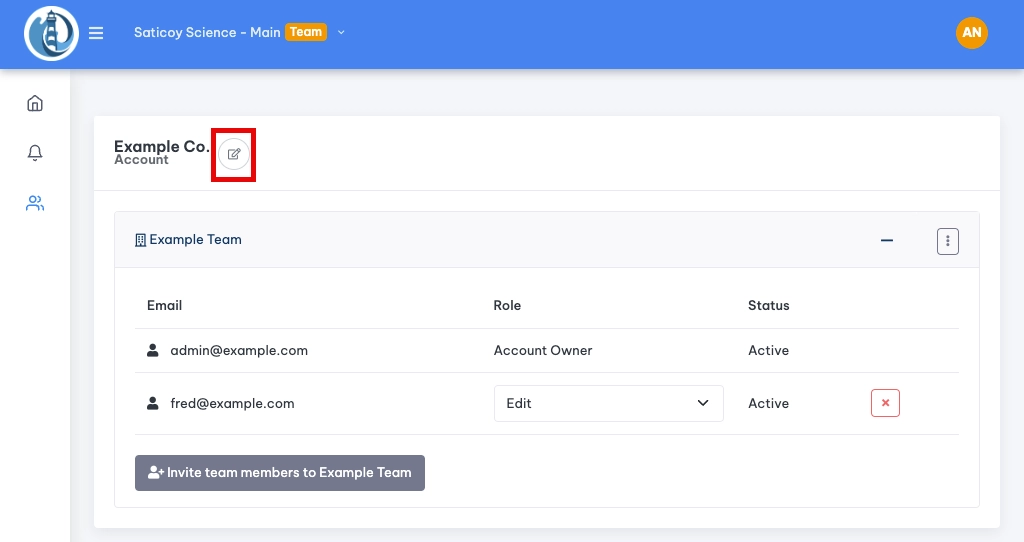
- On the Team page, find your account name.
- Click the pencil icon next to the name.
- Type in the new account name (we recommend using your company name for clarity).
- Save changes.
Changing Your Team Name
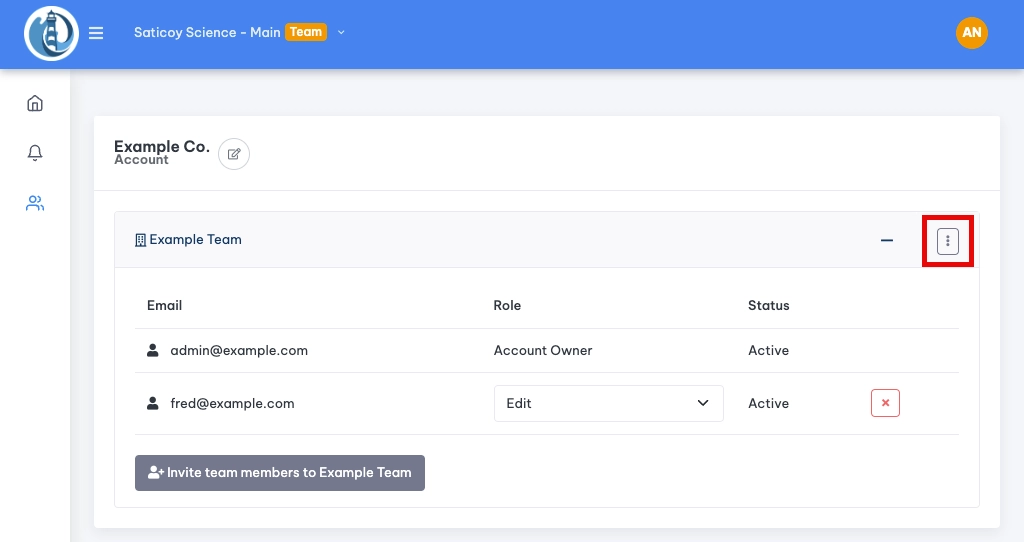
- Locate the team name at the top of the list
- Press the menu button.
- Select 'Edit'.
- Update the team name.
Multiple Teams
Do you manage multiple projects or websites with different teams? LighthouseBeyond can help! We offer support for multiple teams under one account. To activate this feature, please contact our support team. They'll work with you to set up a structure that meets your needs.
