Creating a New Audit in Lighthousebeyond
Welcome to Lighthousebeyond! Let's get you started with creating your first audit. This guide will walk you through the process step-by-step, ensuring you get the most out of your website performance analysis.
Step 1: Navigate to the Dashboard
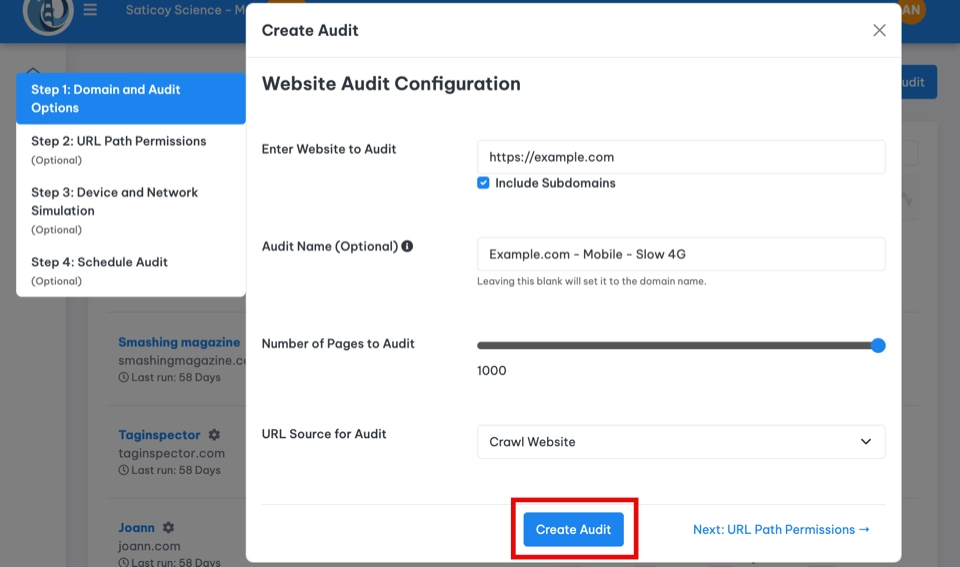
To kick things off, head to your Lighthousebeyond dashboard: https://app.lighthousebeyond.com. Once you're logged in, you'll find the 'New Audit' button – that's your starting point!
Step 2: Configure Your Audit Settings
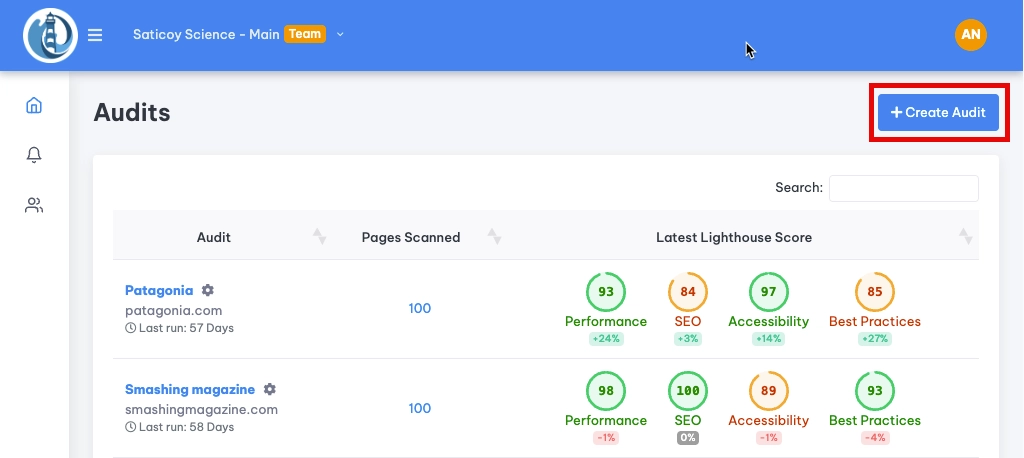
Domain and Audit Name
- Enter your Website URL: Type in the URL of the website you want to audit in the provided field.
- Set an Audit Name (Optional): By default, the audit name will be your domain. However, you might want to customize this if you're testing various scenarios, such as mobile vs. desktop performance, different network speeds, or specific user flows. For example, you could name an audit "Mobile - Slow 4G" or "Desktop - Homepage Only."
Number of Pages to Audit
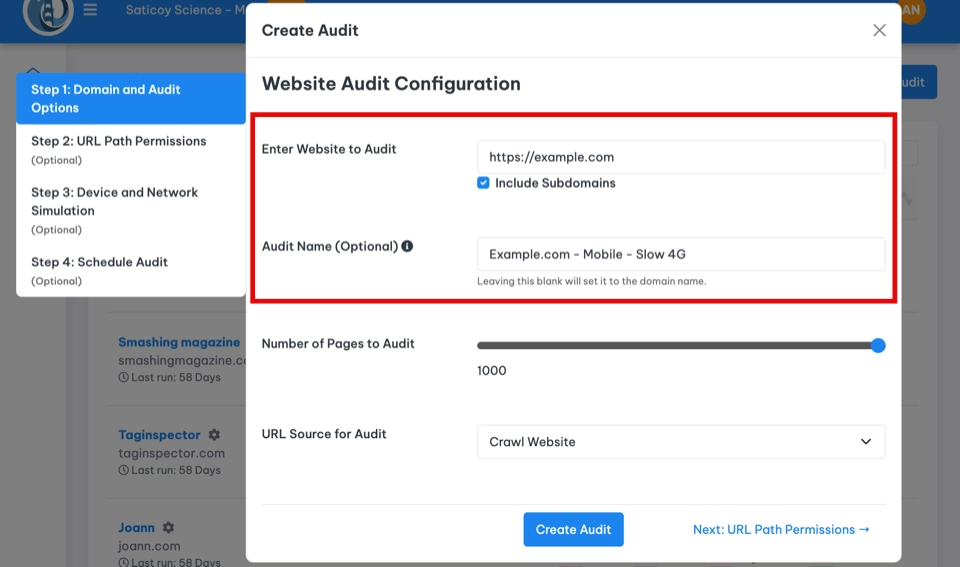
You have the flexibility to audit anywhere from 1 to 1,000 pages in a single audit. If your site has fewer than 1,000 pages, don't worry – only the actual number of pages audited will count toward your monthly limit (which is 10,000 for the Team plan).
Choose Your URL Source
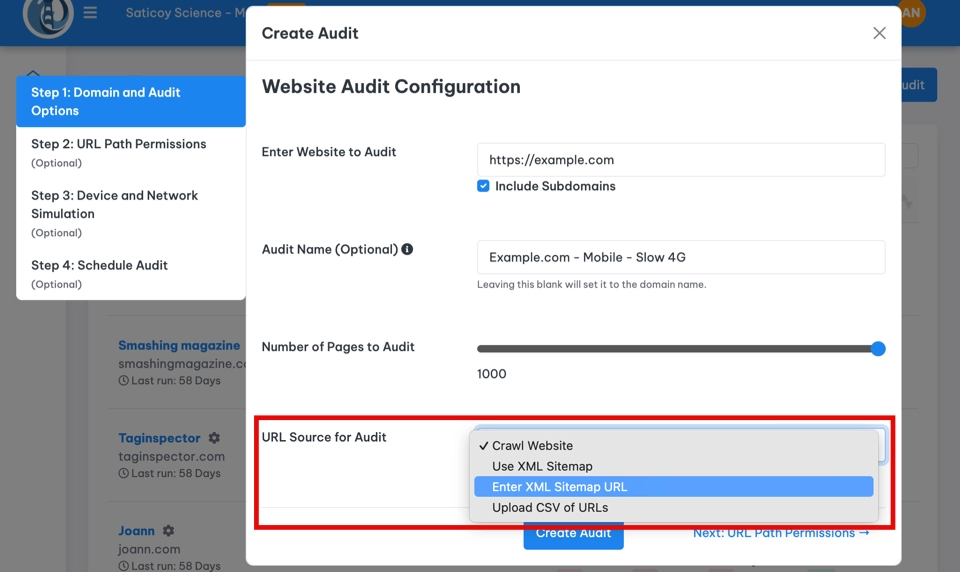
Lighthousebeyond offers several ways to select the URLs for your audit:
- Crawl Website: Select this option to have us automatically crawl your website and include all discovered pages in the audit. It's the simplest way to get a comprehensive overview.
- Use XML Sitemap: If your website has a sitemap, choose this option. We'll check the standard location (https://yourdomain.com/sitemap.xml) or look for it in your robots.txt file.
- Specify XML Sitemap URL: If your sitemap is in a non-standard location, use this option and enter the full URL of your XML sitemap (e.g., https://yourwebsite.com/mysitemap.xml).
- Upload CSV of URLs: For highly targeted audits, select this option and upload a CSV file containing the exact list of URLs you want to analyze. This is perfect if you're focusing on a specific set of pages.
Step 3: Refine Your Audit with URL Path Permissions (Optional)
Include Specific URL Paths
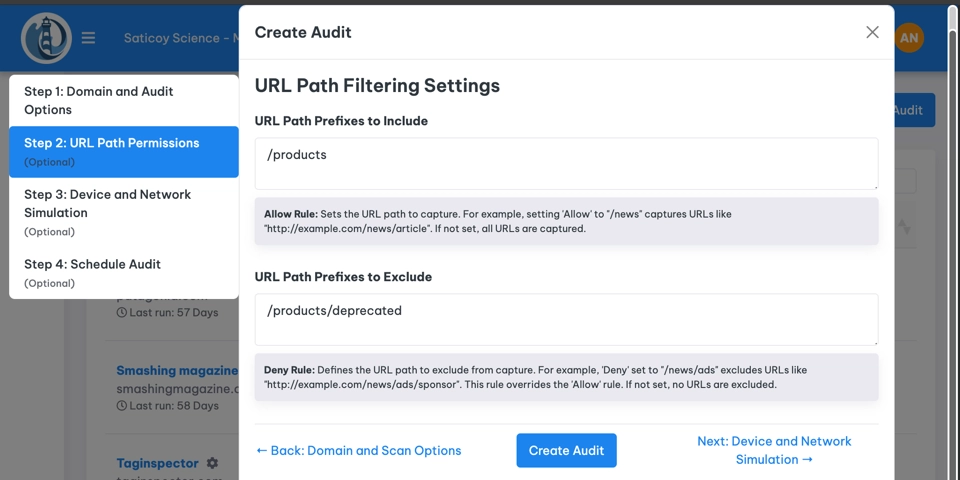
You can fine-tune your audit by specifying which URL paths to include. This is helpful if you want to focus on a particular section of your website, like your blog or product pages.
- URL Path Prefix to Include: Enter the path you want to include. For example, if you enter
/blog, the audit will include pages likehttp://example.com/blog/article-1andhttp://example.com/blog/category/news. If you leave this field blank, all URLs will be considered.
Exclude Specific URL Paths
Sometimes you might want to exclude certain URLs from your audit, such as pages under development or those that are less relevant to your performance goals.
- URL Path Prefixes to Exclude: Specify the paths you want to exclude. For instance, if you enter
/blog/drafts, pages likehttp://example.com/blog/drafts/my-postwill be skipped. This setting overrides the "include" rule. Only enter the path you want to exclude, not the full domain. For example:/blog/drafts.
Example Path
Let's say you want to audit your /products section but exclude any pages related to /products/deprecated:
- Allow:
/products - Deny:
/products/deprecated
In this case, http://example.com/products/new-item would be included, while http://example.com/products/deprecated/old-item would be excluded.
Step 4: Simulate Network and Device Conditions
Choose Your Device
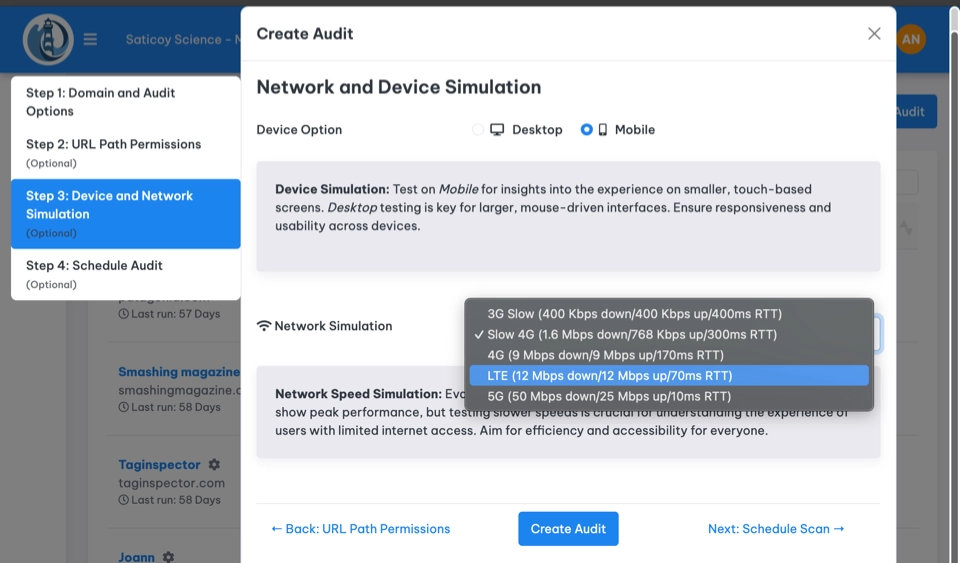
Select either Desktop or Mobile to simulate the user experience on different devices. This choice affects both the viewport size and CPU throttling during the audit.
Network Speed Simulation
By default, we simulate the following network conditions:
- Mobile: Slow 4G (This is the default for Google Lighthouse)
- Desktop: WiFi 10Mbps
Why these defaults? Many users access the web on less-than-ideal connections. Slow 4G and limited broadband are common, especially in certain regions or on mobile networks. By testing under these conditions, you get a more realistic view of your website's performance for a wider audience. Optimizing for slower connections often leads to a better experience for everyone, reducing bounce rates and improving engagement.
In addition to network speeds, changing the device changes the CPU throttling. The goal is to run as a mid-tier device so results are kept consistent and reflect real-world conditions.
Step 5: Schedule Your Audit
One-Time vs. Recurring Audits
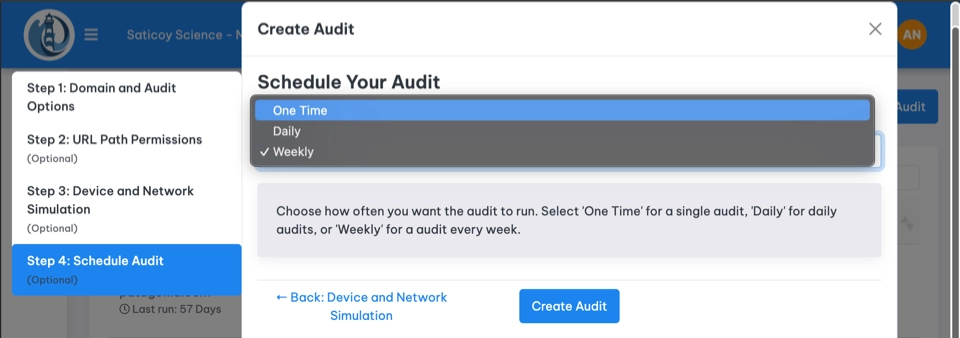
You have the option to run a one-time audit or schedule it to run automatically:
- One-Time: Great for a quick analysis or troubleshooting specific issues.
- Daily: Ideal for tracking daily performance fluctuations and identifying potential problems early.
- Weekly: Perfect for monitoring overall trends and measuring the impact of website changes over time.
Consider Your Plan Limits
Keep in mind that the Team plan includes a monthly limit of 10,000 page audits. You can always check your current and predicted usage on the Billing and Usage page: https://app.lighthousebeyond.com/billing/manage-subscription.
🚀 You're Ready to Launch!
Once you've configured all your settings, click the 'Create Audit' button, and Lighthousebeyond will get to work analyzing your website's performance. You'll receive a notification when the audit is complete, and you can then explore the detailed reports and actionable insights within your dashboard.
